How to create in-camera double exposures with your Fujifilm
By Nathalie Boucry, Fujifilm ambassador
Always wanted to create double exposures but never sure where to start? Fujifilm ambassador takes you through all the necessary steps to create unique images.
I’ve been excited about creating double exposures with my Fujifilm camera ever since I discovered the feature in my X100S way back when. I love the thought of creating something that’s different and requires some planning and effort. But, quite honestly, I never took any time to really apply myself to the topic, so apart from a couple of not-very-exciting-snaps, my excitement about this technique never resulted in anything meaningful. Until recently.
When Ritchie Roesch and I decided to make in-camera double exposures the theme for the final episode of 2023 of SOOC, I knew I had to immerse myself fully in this technique and create a number of examples that would showcase what can be achieved in camera.
The best way for me to tackle something new photographically is by doing, in other words to just start shooting. So, with the added pressure of a deadline hanging over me, I did. And I am so grateful for it too. There’s something very special about the process of creating double exposures in camera.
The more I shot, the more confident and adventurous I got at trying different things. New ideas kept coming and I soon figured out what worked well and what to look out for. It was very rewarding and I’m really happy with the results. They made good showcases for this genre and were used during the latest live broadcast.
What is your take on double exposures? Have you had a go at it? Or do you resonate with where I’ve been – keen, but unsure if you have what it takes to create something meaningful?
If you are new to this genre, you may feel a little overwhelmed or intimidated by the challenge of putting your creativity on the line like that. I hear you but, don’t worry. I’ve got you! You’re in the right place!
Journey with me by following these steps and soon enough you will be well on your way to creating awesome double exposures that you will love!
Ready? Okidoki, let’s go.
Step 1: Set up your Camera
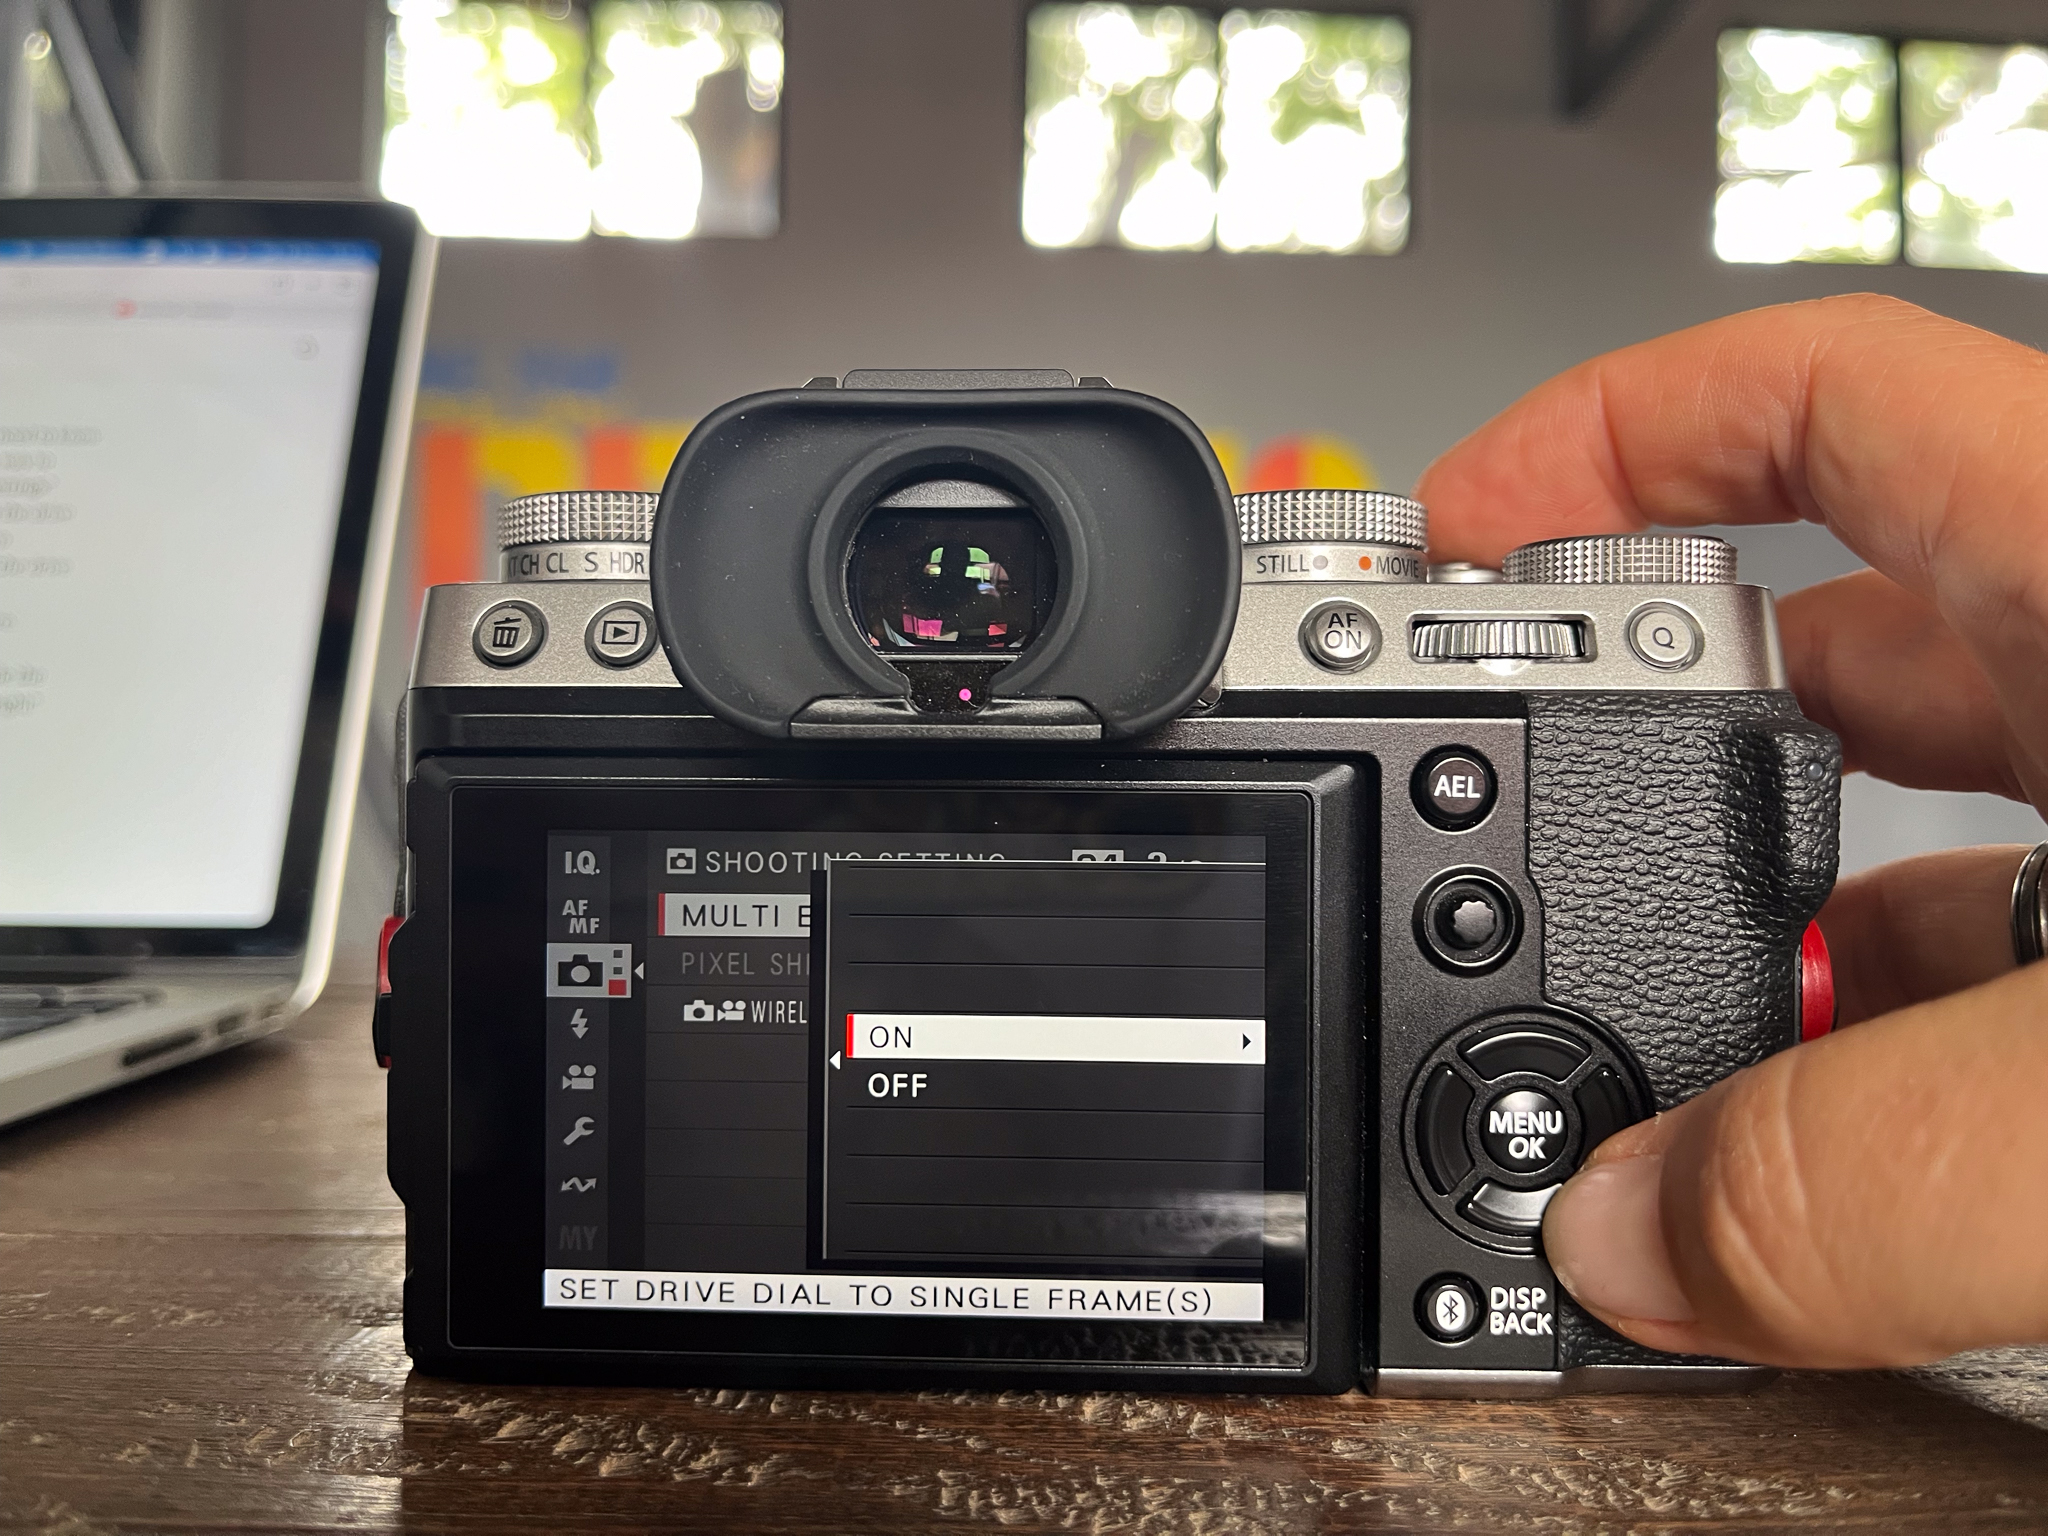
Getting your Fujifilm camera set up to shoot double exposures is not difficult, you just need to know where to find the settings. Fujifilm calls the feature MULTIPLE EXPOSURE and the way to access it varies from model to model.
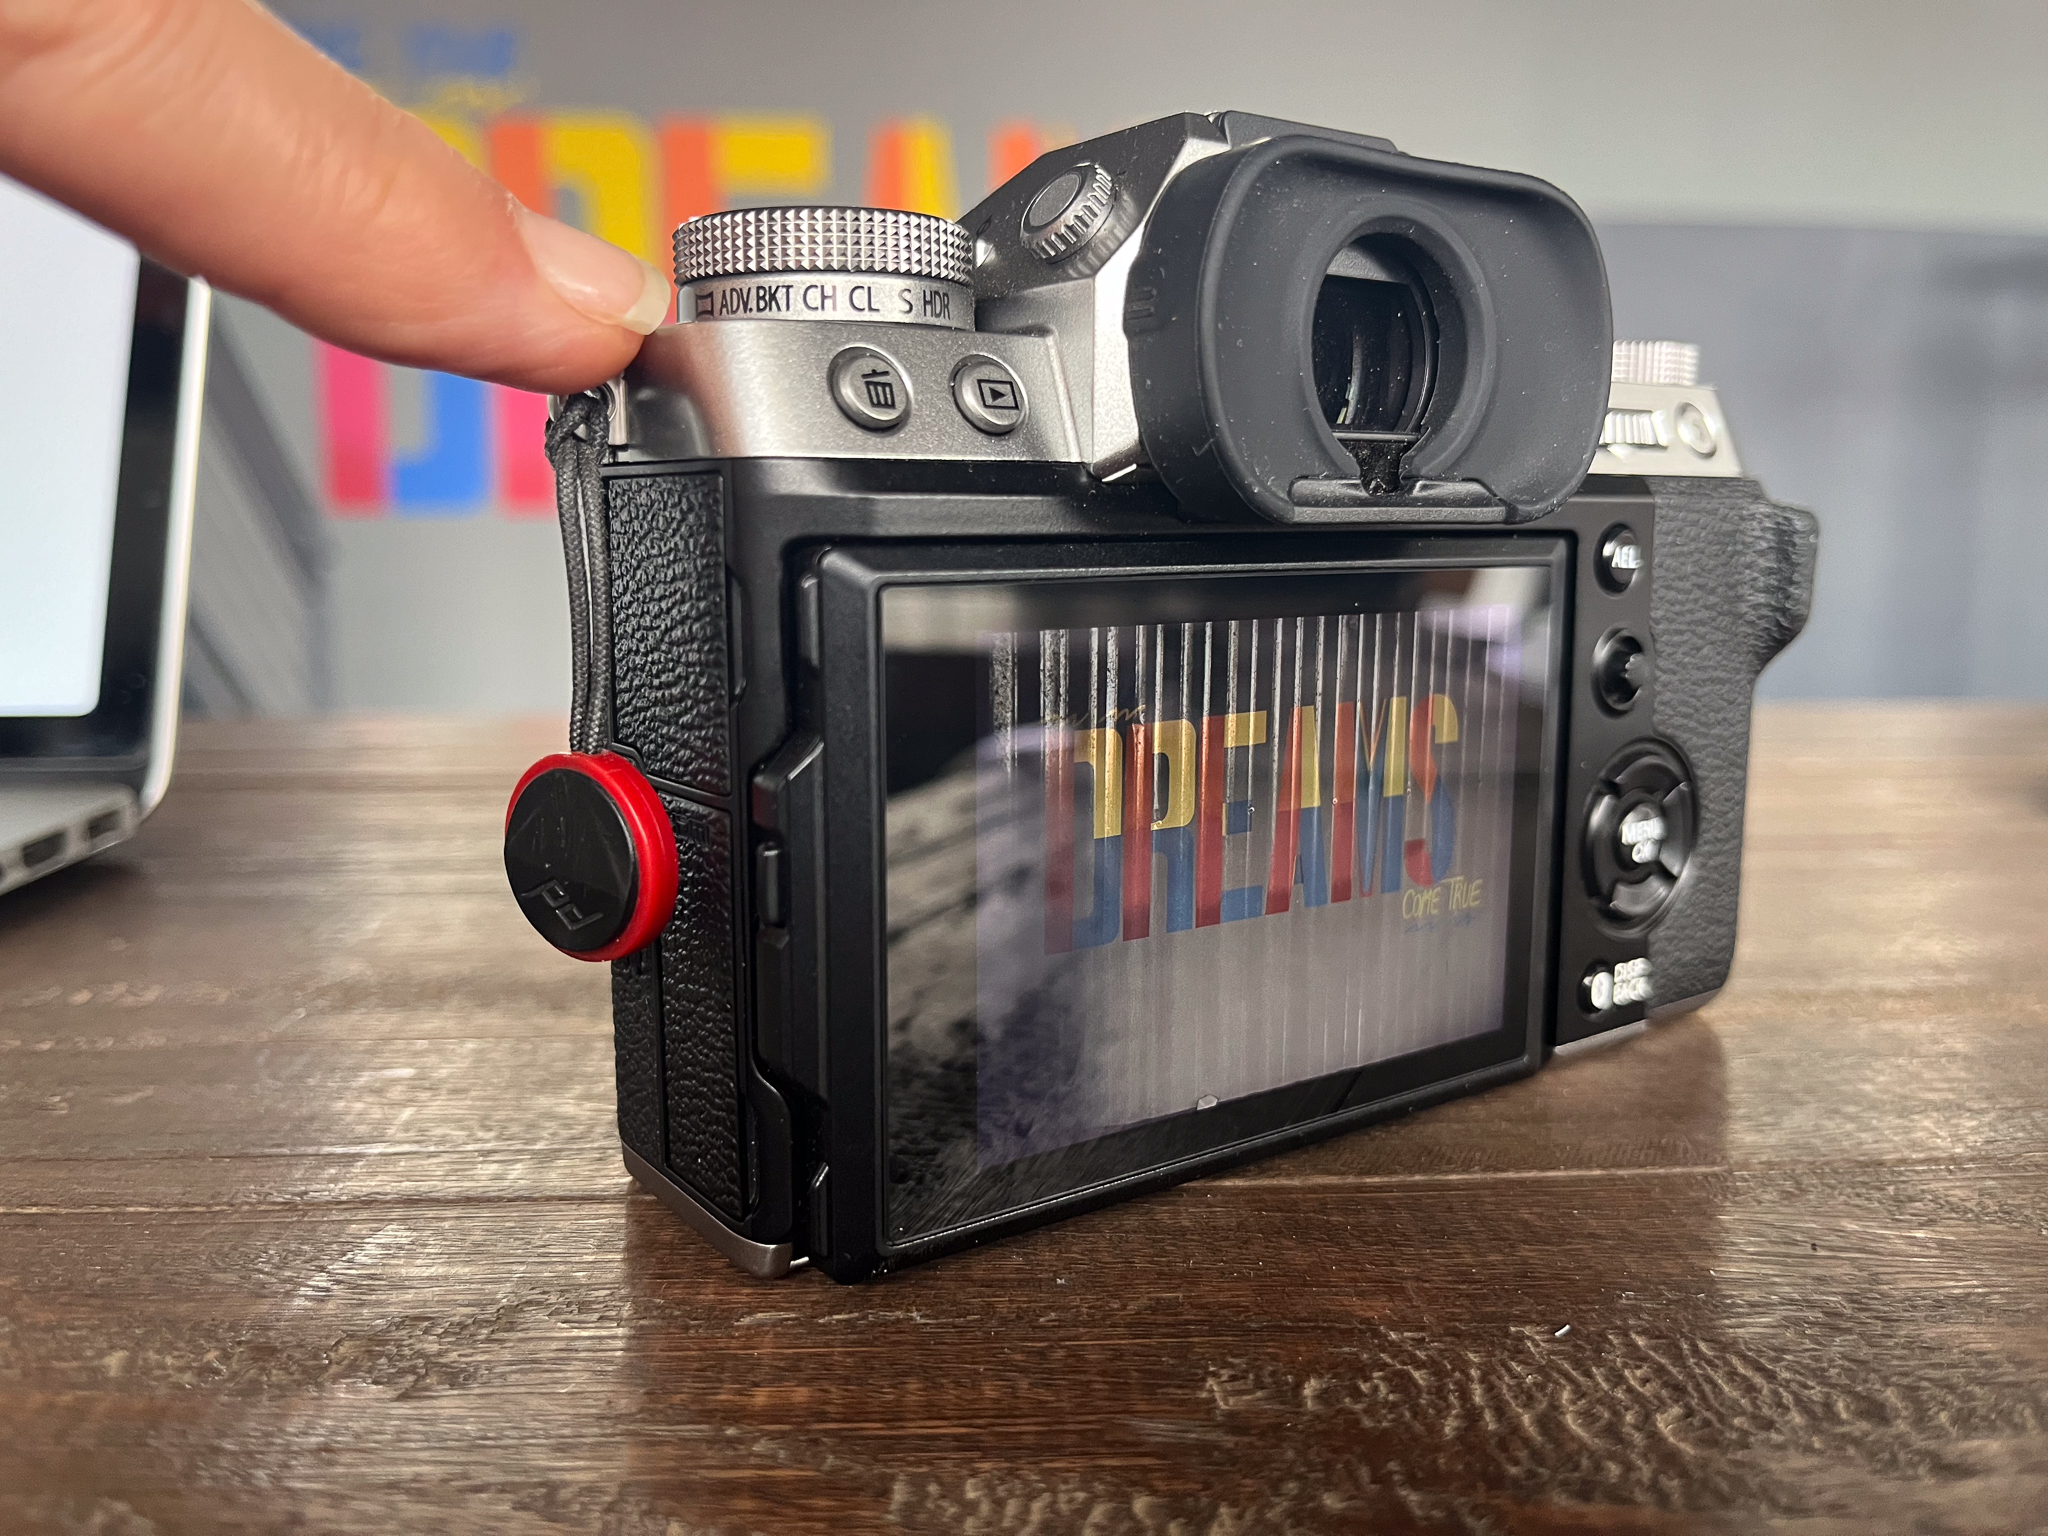
Most commonly, it is found in the DRIVE SETTINGS which may have a dedicated button at the back of the camera or may be found on the drive dial together with BURST MODE, BRACKETING and ADVANCED FILTERS. In the X-T5, the two overlapping squares (the symbol for Multiple Exposure mode) are no longer part of the drive dial but found in the SHOOTING SETTINGS.
To navigate there is not really convenient, so I have programmed the DOWN BUTTON on the D-PAD to give me quick access to this feature.
With the launch of the X-Pro 3, Fujifilm introduced four different EXPOSURE controls inside the MULTIPLE EXPOSURE menu. All models released since then, offer AVERAGE, ADDITIVE, BRIGHT and DARK exposure, and you have the option to combine up to nine exposures into one. Previous models always use AVERAGE exposure and combine only two images.
If you are shooting on a newer camera model, you have to choose the EXPOSURE before you start, but you can decide on the number of images you want to combine while shooting.
Many people find it easier to start their double exposure journey with AVERAGE EXPOSURE so I recommend you go with that first. Remember to set the DRIVE DIAL to SINGLE FRAME.
Step 2: Choose and load a Recipe
Of course there are recipes that are a particularly good choice for this way of shooting. If you have watched Episode 13 of Season 3 you will already know which recipes we have recommended. If not, here’s a recap:
Mystery Chrome (https://fujixweekly.com/2022/12/09/fujifilm-x-trans-iii-x-t3-x-t30-film-simulation-recipe-mystery-chrome/)
It’s pretty contrasty and so lends itself well for the blending of multiple images. Mystery Chrome produces desaturated colours which give your images a nicely finished look. And it is the first ever recipe that was created during a live broadcast. It took Ritchie and I with the support of a team of six live guests in the “Let’s Get Festive” episode of last season, to bring it to life and this month’s theme is the perfect opportunity to celebrate its anniversary.
Dramatic Monochrome (https://fujixweekly.com/2020/02/11/my-fujifilm-x-t30-dramatic-monochrome-film-simulation-recipe/)
This black and white option will also give you lots of contrast and grit which will produce fantastic multiple exposures, especially when shooting in ADDITIVE EXPOSURE mode.
If you need guidance on loading a recipe into your camera, you can watch this quick video: https://youtu.be/lXsdzJ50-UI?si=atEHrqKtlKNpeN8g.
Step 3: Start Creating
In order to get a feel for the process, I recommend you start creating some images at this point. Just start shooting. Don’t procrastinate. Don’t overthink it. It’s best to get familiar with the technical part first. We’ll get to the creative aspect later.
With MULTIPLE EXPOSURE mode turned on, go ahead and take your first image. You will see a menu overlay at the bottom of the frame as the image appears that lets you either keep the shot or try again.
Once you have committed to your first image, it’s time to find your second exposure. The first image will stay visible during this step which is super useful as it makes lining up your second shot quick and easy. In true Fujifilm WYSIWYG (what you see is what you get) fashion, you will see what your final image will look like before you’ve taken your second image. It’s a fantastic way to accelerate your learning curve. When you are happy with the second exposure, press DISP./BACK. The image will be saved and you are ready to create your next image.
For now, I strongly recommend you stick to layering only two exposures, but you are welcome to experiment what happens if you keep on adding more exposures.
When you press the PLAYBACK button, you will see that the camera recorded your double exposure as a jpeg. If your camera is set to shoot RAW+JPEG it will also record each of the individual exposures as separate RAW files. It does not create a RAW file from your double exposure though.
Continue reading Nathalie’s article here: https://blog.nathalieboucry.com/have-a-shot-at-in-camera-double-exposures/

